Three days of intense Northwest rain and wind. Our valley is suddenly flooded. I have spent these days trying to complete what I had meant to finish a few weeks ago, which are my "new and improved" vent/feeder boxes, and a better, more protective roof.
 |
| Feeder box loose on a super. This has an aluminum tray on a third, to pout dry sugar into (or fondant), and is open otherwise. It is about 1.5" tall, and has weatherstrupping along its top side so the vent box sits on it without leakage, and without being propolized together. Seems to work. Surprise was that bees totally cluster here enmasse in the winter, instead of being separated by the frames. I don't know what the Queen does. |
 |
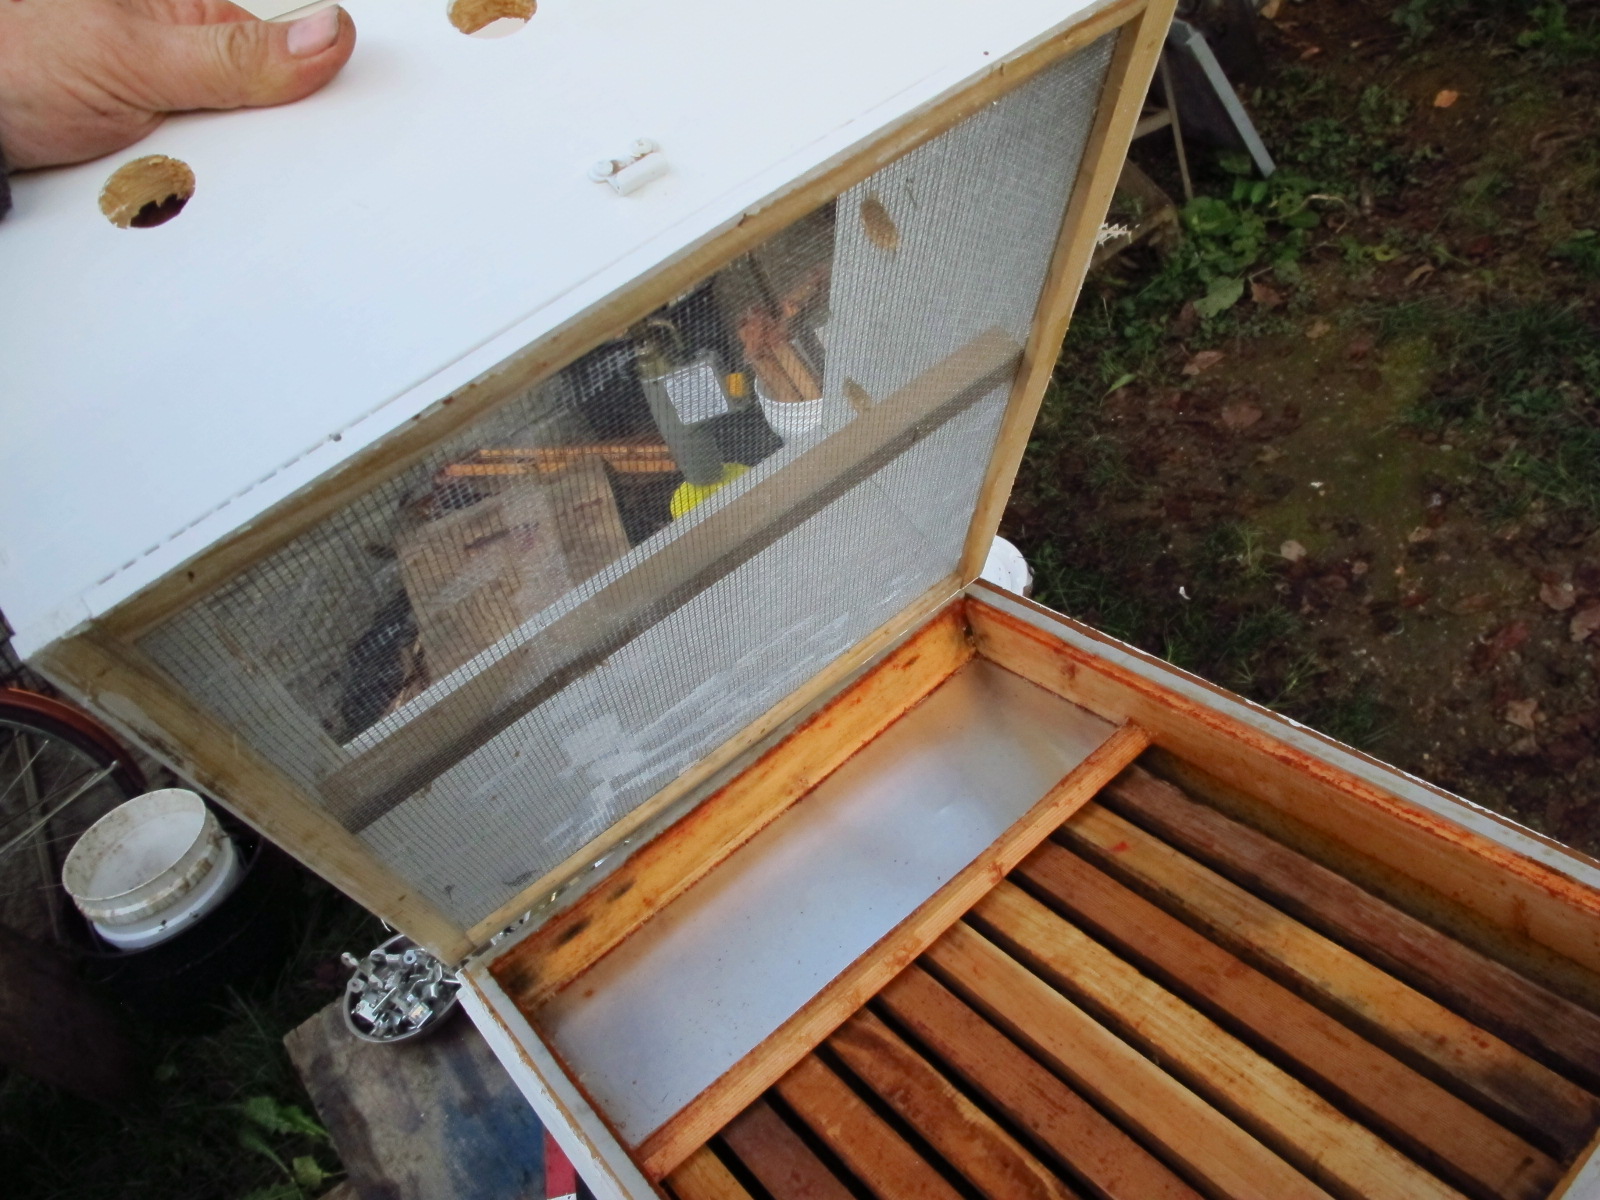
| Opening up the vent box- hinged with one or two hinges on the back. This year I added sceen (hard to see)- and a 3/8" strip of wood so I can pull off the feeder box in Spring and set just the vent box down up into May. |
I don't know that there is any data to support it- but it sure seems like common sense that dampness and mold, and a dripping wet inner cover for 3 or 4 months, can't be a good thing for a hive trying to survive. But who knows. Lots of bugs like mold, and lots of bugs like damp. Still- proof is in the pudding. I've spent quite a bit of time trying to work out a system that keeps the hives dry through to Spring, and constantly modify the design. Since I started applying it (together with winter dry sugar feeding), my hive losses over winter have been nearly zero. One, maybe, last year- but it was because a queen died and I combined the hive.
 |
| These are the shavings in a vent boz sitting on a feeder box. The feeder box has lathe around it, to seal the joint- but that's only if they dont get it propilized. I am not sure if this is needed. |
This could be luck- probably is. But I know my hives seem like they are way stronger, and way healthier, and I credit this practice for at least some of this.
I have designed a top vent box- which is similar to a "blanket" that a number of people use- but this one makes a space at the top of the hive, where the bees tend to gather in a mass. It vents through a fabric into cedar shavings, and has a tray where i can place dry sugar or fondant. It is also "openable"- it has hinges for inspection, and is weatherstripped so it seals up, it doesn't get propolised shut. The idea of venting the hive through fabric (usually burlap), isn't new- but the other items are.
 |
| Some of my vent boxes getting ready to put bottom feeders on. The vent holes are screened- but needn't be. The vent holes are as high as posible, but low enough that the telscoping cover doesn't cover them. The idea is to have wind blow through and dry out the shavings. If I built them again, I might try to make them taller, so a mason jar could fit, and I could use them as summer feeders too. I used pre-primed 1x6 from Lowe's. Worked great, and cheaper than anything else. In retrospect, it might be cheaper to order full supers from Mann Lake and drill them. But- these were pre-primed- and I already had the material. |
In the past few years I have used a white fiberglass filter fabric-a commercial grade- which seemed to work great- but over the winter, the bees would get stuck in it (some), tear it apart so it was hairy, and propolize areas of it, and I had to replace it each year. This year I have installed metal 1/8" hardware cloth (aluminum screen is too baggy- and it is important that the screen does not sag on top of the supers below), and laid black weed filter cloth over this, and over that, about 4" of cedar shavings from the feed store. I have great hopes it will be better- but some concerns- primarily, that the metal will not be as condusive to clustering as the warmer fabric was. They looked, in the dead of winter- comfortable. In some, I put a camera. They looked happy. They weren't moldy. They seemed to be singing songs. I don't want to anthropormorphize- but the fact is- they all did well. Year 3 of this will be more convincing.
 |
| This is the black weed barrier placed over the metal screen, |
In addition, I have finalized a design for a metal roof that protects the hive from rain. Last year- I decided to forgo this- as I have metal telescoping covers in good shape and felt it was a waste of time to put another roof over that- but I found the rain working its way in between the supers- and making black mold there. Plus, it wears down the nice paint job I have done. Best to protect them.
 |
| This is the roof- on left. Looks like a piece of corrugate metal bungee corded on top of the hive- which, in efftect, it is. |
So this year- they all get a roof. I am using Lowe's metal roofing- cutting 8 foot lengths in half (an 8 footer costs 13 bucks I think)- and then screwing these to 2x2. One 2x2 sits on the front edge of the top cover, and the other hooks up against the back. I then have a bungy cord that straps it down to a scew I put low on the hive, and the whole thing is easily unhooked. A good windstorm (I think one is coming up) will tell if it is succesful. It can't bang around- and it can't blow off. It can't bang around as it will keep me, and the bees, awake.
I've only made one- it takes work as I have to bend and seam the edges as they are super sharp ( I sliced a finger just touching it)- but it looks to be a great solution. Its simple- but I confess it took me a lot of drawing to figure this out- and I have only just made a prototype after months of working on this. The hard part was trying to make it light, easily stored, easily removed, durable, and mostly- wind proof without have to drop a concrete block on it (which I have usually done- but means a lot of concrete blocks on the roof- and even then- sometimes they blow off and the block comes sailing down...and I don't like moving alot of concrete blocks).
That's the winter plan. I have 8 hives all hunkered down, and 12 more to go- and winter is rapidly coming upon us. I hope to get them all happy and warm by the end of the week.


Comments
Post a Comment